Mastering Joystick Control: Arduino Nano Tutorial
In the world of DIY electronics, the Arduino Nano is a powerhouse for creating innovative projects. One of the most versatile components you can add to your arsenal is the joystick module. In this blog post, we’ll dive into the fascinating realm of joystick control and learn how to interface a joystick module with an Arduino Nano.
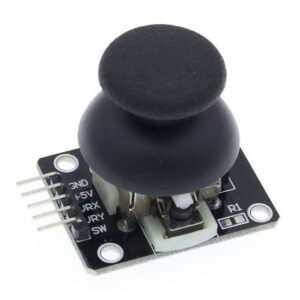
Understanding the Joystick Module: Before we jump into the technical details, let’s take a moment to understand the joystick module itself. This compact module consists of two potentiometers (one for the X-axis and one for the Y-axis) and a tactile switch. By manipulating the joystick’s position, you can generate analog signals that can be read by the Arduino Nano.
Components:-(click on the links below to purchase)
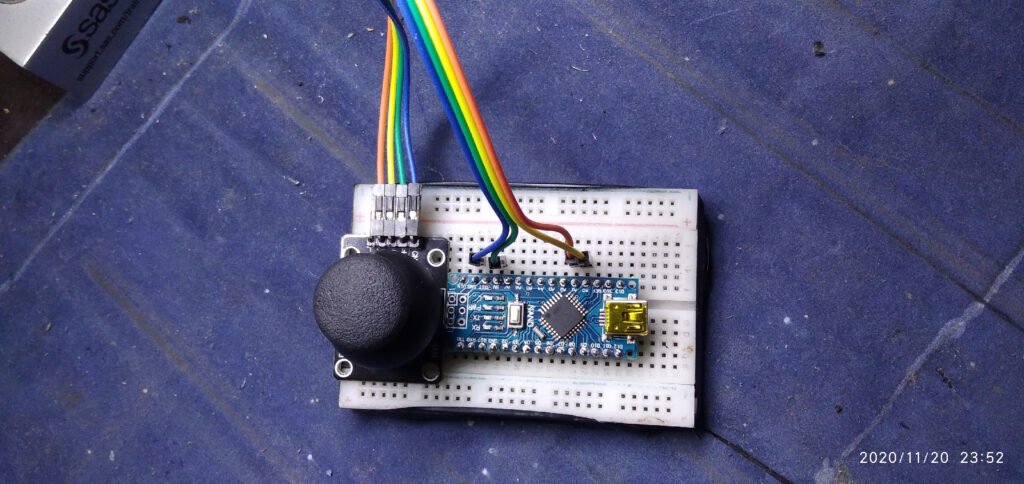
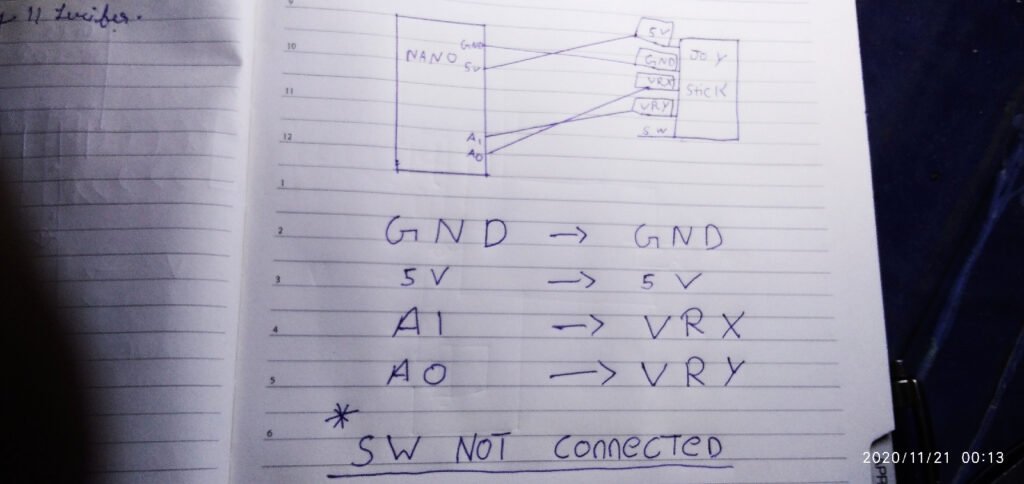
Wiring the Components: The first step in our tutorial is to wire the joystick module to the Arduino Nano. Using jumper wires, connect the X-axis and Y-axis outputs of the joystick module to the analog input pins A0 and A1 on the Arduino Nano, respectively. Additionally, connect the switch output to a digital input pin, such as pin 2.
Writing the Code: With the hardware setup complete, it’s time to write the code for our Arduino Nano. We’ll use the Arduino IDE to write a simple sketch that reads the analog values from the joystick module and maps them to servo motor positions. This will allow us to control a servo motor’s position by moving the joystick.
Testing and Fine-Tuning: Once the code is uploaded to the Arduino Nano, it’s time to test our setup. Move the joystick in different directions and observe the movement of the servo motor. You may need to fine-tune the code and adjust the mapping values to achieve the desired behavior.
Expanding Your Project: Now that you’ve mastered joystick control with Arduino Nano, the possibilities are endless. Consider integrating additional components, such as LEDs, motors, or sensors, to create more complex projects. With a solid understanding of joystick control, you’re well-equipped to tackle a wide range of DIY electronics projects.
Conclusion: In this blog post, we’ve explored the exciting world of joystick control with Arduino Nano. By interfacing a joystick module with an Arduino Nano, you can create interactive projects that respond to user input in real-time. Whether you’re a beginner or an experienced maker, joystick control is a valuable skill to add to your toolkit.
Code & Schematics
//Theishanjain.com  subscribe to our Youtube channel @Theishanjain
//How to use the joystick module.
//Read the code below and use it for any of your creation


void setup() {
  Serial.begin(9600);//enable serial monitor
}
void loop() {
  int joy = analogRead(A0);//get analog value (0-1024)
  int joy1 = analogRead(A1);//get analog value (0-1024)
  String x = "x axis ";//creating string variable
  String y = "y axis ";//creating string variable
  Serial.print(x + joy);//print x axis value
  Serial.print("\t");//tab space
  Serial.println(y + joy1);//print y axis value
  Serial.println( "");//space
  delay(100);//delay
}